

Welcome to Budget Builds! My goal with this series is to show folks that, contrary to popular belief, you don’t have to spend a ton of money to get into the world of PC gaming. If you haven’t checked out the first post in this series check it out here. If you have checked out the last post, welcome back and thanks for joining me on this journey!
For the first project in the budget builds series, I’m showing you the easiest way to get into PC gaming on a budget. Many people already have a family computer and when you’re on a budget it doesn’t make sense to buy a brand new top of the line PC. So what do you do then? You modify and upgrade the parts in your existing PC! I’ve done this many times before both for myself and for clients, and it is much more cost effective to upgrade a few key components than it is to buy a whole new PC.
Now, it is worth noting that if your family computer is a laptop you won’t be able to make the necessary upgrades to use it for gaming. That’s not to say there aren’t laptops out there capable of light gaming, but it does significantly limit your options. This guide will show how and what to upgrade on a desktop PC to make it more viable as a gaming PC. If you don’t have a desktop PC already but are interested in doing this yourself, check out my first post to see how I found a great starter PC for under $100. So with that in mind, we first need to answer an important question:
What makes a gaming PC?
With a quick Google search you can find any number of articles all telling you what makes for a good gaming PC. In the simplest terms, a gaming PC can be thought of like a high performance car. Regardless of how it looks it needs to have to be built to perform. Now I can’t tell you the best way to get lots of power out of your car, but I can tell you computing performance comes down to 4 main components: the CPU, memory (or RAM if you’re old-school like me), storage, and GPU.
With the Dell PC I chose to start this project, I really only needed to make a few key upgrades. However, I’m still going to take some time to explain each of the performance parts in this build so you understand why I made some of the choices I did and how you can do it yourself. Each of these components has a few key specifications (referred to as specs from here out) to look out for when making your own build. So lets move on to the build!
CPU: Intel I7-6700

Key Specs:
- Processor Speed: 3.4 GHz
- Processor Cores: 4 (quad-core)
The Intel I7 is a great CPU for getting started in gaming. For many years the I7 has been one of Intel’s highest performing processors and thanks to it being in many pre-built PCs, it can be easy to get a good deal (like I did with this one). This is one of the components of the PC that I will not be upgrading since it’s already a great option. Another solid option is the Intel I5 which can usually be found even cheaper. However, depending on the generation you might be better off spending a few extra dollars to find an I7. No matter what you choose for your CPU, there are 2 key specs to pay attention to: the speed of the processor and the number of cores available.
When it comes to gaming more CPU speed is usually more better (sorry grammar police). Processor speed is measured in Hertz and the bigger the speed the more calculations that processor is capable in a set amount of time. This is important as that’s essentially all the CPU does all the time. The CPU is the brain of the computer and don’t we all wish we could think faster. The I7’s 3.4 GHz is more than enough for most applications, especially gaming.
The other key spec for CPUs is the number of cores. Cores are essentially smaller processors within the CPU that allow tasks to be split up across multiple sections of the CPU. The I7 in this build has 4 cores so when muti-tasking the CPU can essentially do 4 things at once rather than slowing down to do 1 task at a time. There is an argument that can be made that says this isn’t important for gaming. That is technically correct because in gaming you usually only use 1 core at a time anyway. However, if you’re using this computer for work, browsing the web, and other things besides gaming, more cores will be a big help.
Memory: Kingston DDR4 RAM (2x8GB)

Key Specs:
- Total Memory: 16GB
- Memory Standard/Speed: DDR4 2133 MHz
Memory helps your PC work by essentially holding specific pieces of information close by until it is needed. The more space you have available in that memory, the more you can hold at any given time. Gaming can use a lot of this memory at once. For this reason I always recommend at least 16 GB of RAM for any gaming PC. In many cases you can get away with only 8 GB but you will always be better off with more in high performance situations. For this build I went with 2 sticks of 8 GB RAM which makes a total of 16 GB. I won’t go into a ton of detail why, but typically no matter your use case you will get better performance if you can use 2 sticks instead of 1. That’s not to say you can’t just get 1 single stick of 16 GB RAM, you absolutely can! But trust me you’ll be much happier splitting across 2 sticks and it’s usually around the same price.
Before upgrading your Memory you will want to know what kind your CPU and Motherboard can support. This is where the Memory Standard and Speed come in. The memory used in this build is within the DDR4 standard and has a maximum speed of 2133 MHz. DDR4 is one of the more recent memory standards in use. DDR5 is even more recent but for budget purposes it’s best to go a little older. Systems using DDR3 (an older stander) can be found for fairly cheap and can also be used but I wouldn’t recommend it if you’re looking to future proof your build.
The I7 used in this build will support up to 64 GB of DDR4 and will support a max speed of 2133 MHz. I knew from the start I would need at least 16 GB of memory and I found a great deal on this kit. This is one of the few upgrades I actually had to purchase to make this build a reality (more on that later). I only spent about $15 buying this on eBay. Memory can be expensive depending on the technology so a price like this is not necessarily the norm. Always do your research before making any purchase. In this case, Kingston is a brand I’ve used before and I knew the specs matched what I needed so I bought the kit.
Storage: 256 GB Samsung m.2 SSD

Key Specs:
- Storage space: 256 GB
- Storage medium: Solid State Drive (SSD)
The Dell PC I bought for this build actually came with a 500 GB Hard Disk Drive (HDD) which is great! 500 GB is a nice amount of storage, and when you’re buying a used PC like this on eBay often storage is not included. The fact we had that available is great! So why did I get rid of that for a much smaller Solid State Drive (SSD)? Well just like many of the parts we’re talking about today, the key factor is speed.
The HDD was the standard storage medium for PCs for many years. That was until more recently when the SSD became more popular for its vastly improved speeds. The HDD relies on moving parts which tend to slow down over time. The SSD used flash memory which is much faster to read and write compared to the process used in HDD. The HDD could definitely be used if you didn’t want to spend extra, but the SSD is a big quality of life upgrade I would recommend for any PC or laptop that doesn’t already have one.
For this build I happened to already have a 256 GB SSD on hand that I was able to use. The motherboard in this PC had an M.2 slot that allowed it to fit so I decided to use what I had on hand rather than trying to find something else with more space. I would typically recommend having at least 500 GB of storage available, but 256 is the bare minimum that I would say is worth putting in any build. Just keep in mind you may need to delete unneeded files or uninstall old programs if you need more space.
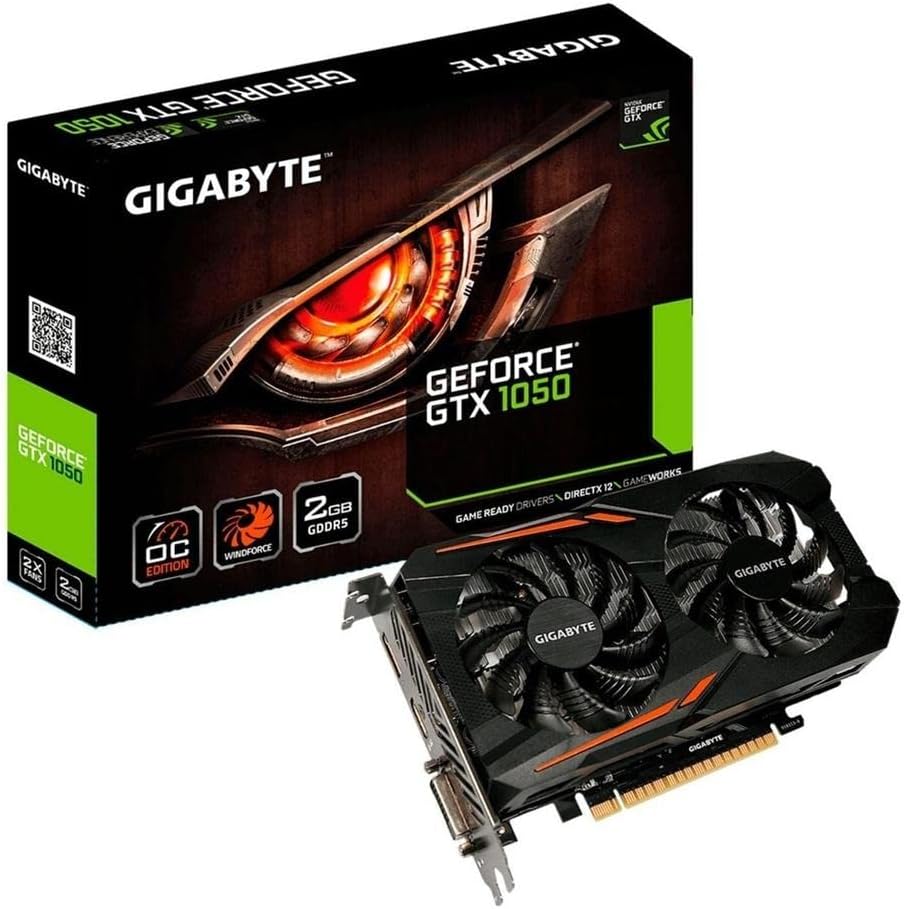
GPU: Gigabyte GTX 1050 OC (2GB version)
Key Specs:
- VRAM: 2 GB
When it comes to gaming PCs, one of if not the most important part is your graphics card or GPU. Video games take a lot of processing power and memory to keep all the graphics and visuals running smoothly. While, it is possible to rely strictly on your CPU and Memory to handle this, a GPU takes the strain off of these other components and makes things look and perform much nicer. Think about it, when you’re busy and have a lot on your mind the last thing you want is to be handed even more to do.
For this build I am using a Gigabyte GTX 1050 OC as the GPU. I know that’s a lot of numbers and letters that probably don’t make much sense. The key thing to know here is that this GPU has 2 GB of dedicated memory. This functions the same as our PC’s memory we discussed earlier, but this is strictly used for graphics processing. For most eSports games and even some larger titles, 2 GB of VRAM is more than enough.
There are plenty of affordable graphics cards out there that would meet these requirements for this build. Google is our friend and you can find lots of great deals by finding used cards on eBay and Facebook marketplace. However, in this case this is another component I already had on hand.
So how much did I spend for all of these upgrades?
$15 is all I spent on upgrading this PC! That’s not a lot at all, but a lot of the components were ones I already had on hand. However, you can usually find great deals on these parts just by searching online. If I had to buy all of these parts on the used market I would have expected to spend at least:
- $15-30 for the Memory
- $25-40 for Storage
- $50-100 for the GPU
That’s only $90-170 for all the upgrades needed to make your current desktop PC into a gaming PC. If you’re patient and you do your research, it’s extremely easy to find deals on this stuff. You may even be able to spend less depending on your needs and what’s available at the time!
So you upgraded your PC…now what?
Now comes the fun part! If you’re following along yourself, you’re done and now have an affordable PC that can run many modern games and give you hours of entertainment! For me, now I get to play games to make sure everything works the way I want. This is a computer that I plan on selling as soon as I can make sure it’s ready and isn’t going to crash unexpectedly as soon as a customer takes it home.
In the next and final post of my first Budget Builds project, I’ll talk about how I check the performance of the PC during games. I’ll talk about what to expect with a rig like this and what it would cost to buy a similar PC brand new.
Thank you for following along in this journey! If you like this content please follow Bloom Computing on Facebook and stay tuned because I’m just getting started! If you would like to talk to me about building a custom PC for you that’s even better than this one, please fill out the form on the Contact Us page and I’ll reach out to you as soon as possible!
Leave a Reply
You must be logged in to post a comment.